Saturday, November 26, 2011

so knotty tutorial - sweater letters

welcome back for the very last "so knotty" tutorial. this one is actually my favorite, and it looks like it was a hit with a lot of you gypsies. so hold on to your knitting needles, and away we go!

now, i made xmas letters, but you can use this technique to create letters for any time of year. and the best thing is that you can use any left-over chipboard letters for this.

 i secured the end of the twine with a little dab from the hot glue gun,
to anchor the twine and make it easier to "knit"
 once the anchor point is secure, start wrapping the twine around the letter.
keep wrapping until the entire letter is covered, then use another little dab of hot glue
to secure the end of the twine on the back.

and that's it! really! that's all there is to it.

thanks everyone for coming to the caravan for "so knotty" this month. i hope you've learned some tricks and been inspired. the "so knotty" prize winner will be announced december 1. so make sure to return and find out if you've won, and also to see the first oh-so-jolly xmas project!

Wednesday, November 23, 2011

so knotty tutorial - xmas tag

welcome back gypsies! it's beginning to look a lot like xmas, so what better way to celebrate that to get our hands dirty and make a xmas tag!

this tag has lots of different techniques going on, and using twine is just the icing on the cake. so are you ready gypsies? then hold onto your sleigh bells and away we go!
 so let's start by making our holly and berries. i used tim holtz's "tattered leaves" die and a piece of authentique's "free bird" paper to make the leaves, and chose the twinery's "marachinno cherry" twine, which is an awesome xmas red.
to make the berries, i put a dab of "glue n seal" on a piece of scrap paper, then used my burnisher to hold the twine in the center while i coiled around until i got a berry that i liked. you might need to sculpt a little and flatten a little to get the shape. remember to stay small.
you'll need three berries for the tag. while the berries dried i shaped the leaves by misting them with water and crumpling them up. then i flattened them out and folded each in half, to get the "vein" down the center, and curled the edges a little for a more natural look.
next came the green layer. i took a piece of authentique's "free bird" paper and ran it through my sizzix using an "alterations" texture fold. using ranger ink's acrylic dabber in "pearl", i lightly painted the embossed paper, giving it a metallic look.
next i glued down the leaves and berries to the edge of the card - i like to use a glue gun because i can't stand waiting for glue to dry. once glued in place, i tipped the edges of the leaves and bits of each berry with glossy accent, and then sugared them with twinklets "diamond dust".
while the diamond dust dried, i prepared the tag. cutting a 3 1/2"x6" tag from a piece of authentique's "gathering" collection, i sanded the heck out of the edges, then edged it heavily with both "festive berries" and "evergreen bough" distress inks. lots of blending and layering gave me the vintage color.
once all the pieces were dried and ready, i glued down the green card onto the tag, added a strip of crumpled and inked craft paper, and hand stitched down the card with twine. i used my biggest paper needle and sewed a back stitch.
then it was time for the fun stuff. i took a chipboard scrap and used tim holtz's "fleurish" die to cut a fleurish. i coated the whole with the pearl dabber and glued onto the edge of the tag., the pom-pom trim is from my treasure drawer, and the xmas quote and "to" tag are elements from authentique's "wonder" collection. red stickles adds sparkle to the tree, and of course the edges are all sanded. i used "iced spruce" distress ink on the edges of the xmas quote. a punched hole and some more twine, and the tag is ready to give.
i hope you have been enjoying my "so knotty" tutorials as much as i've enjoyed making them. don't forget to leave your comment below for your chance to win this fabulous prize.
have great journeys this week, and come back to the caravan for the final "so knotty" on nov 26 - "sweater letters"!

Saturday, November 19, 2011

so knotty tutorial - home sweet home hanger

welcome back gypsies for today's "so knotty" tutorial, the "home sweet home hanger"
for this project i used papers from authentique's "splendid" collection, a beautiful combination of blues, greens and golds. the twinery's "stone", "cappuccino" and "buttercream" coordinate beautifully.
so first, i sanded and shredded the heck out of a 3 1/2"x 5 1/4" piece of the "foundation" paper that comes with every collection. it's really a great idea - you get two 12"x12" sheets in a base color with subtle pattern that coordinates with the whole collection.

i also chose a "headline" card from the collection as the main element of the hanger and sanded the heck out of that too.
to make the "knotty" flower, i started by tracing 5 circles onto a piece of scrap paper. i used "glue n seal", filling a circle with a liberal amount. then, starting in the center and using my burnishing tool, i set the end of the twine {the twinery's "lemon drop"} in the circle's center and started working it into a coil. you'll want 5 circles to make a daisy.
the great thing about "glue n seal" is that it has a fairly long dry time, and dries clear, so you have time to work and your glue doesn't show!

while the flower petals dry, it's a good time to braid the hanger. using "stone", "cappuccino" and "buttercream" twine, cut 5 strands of each color  ~14" long. keep each color bundled together, and tie a knot at one end, leaving a bit as the "tassel". then braid the entire length leaving about 2" at the end to tie a knot, but don't tie it yet.

assemble the card, layering the "home" element on top of the blue paper, then onto a 4"x5 3/4" paper that's been sanded and inked with "iced spruce" distress ink. punch two regular-sized holes in the top corners of the card. feed through the braid so your knot is on the card front, then thread through the loose end of the braid, and tie it off leaving the knot and a tassel on the front of the card.

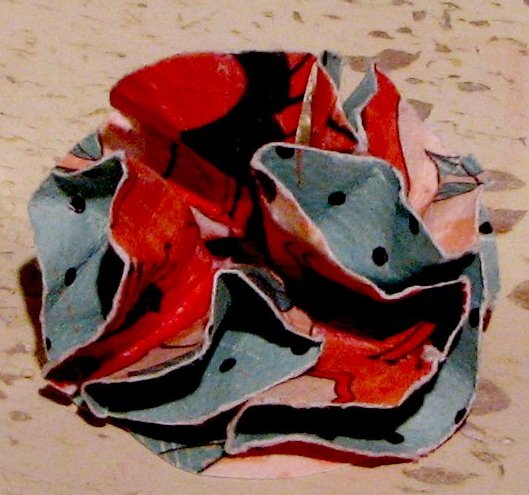
to assemble the flower, start by tieing a bit of twine into a button, and glue the button as the flower's center. then glue the petals around, leaving a little space in between. i used a piece of authentique's "free bird" paper, and tim holtz's "tattered leaves" die to create the leaf, crumpling the paper and inking the edges with "iced spruce" for added leafiness. a tiny heart lock tied with twine completes the hominess.


i hope you were inspired today to make good things - things for home and hearth. don't forget to leave a comment below so you're entered to win this fabulous prize.
and make sure you come back on november 23 for my very festive xmas tag. there's lots of techniques in that one so you won't want to miss it.

thank you for stopping by my caravan, have great journeys this week, and stop back soon!

Friday, November 18, 2011

quilt of life

 
hello gypsies. it's november, which for me means family, and reminiscing and family. so to celebrate, i created the "quilt of life". i'm very fortunate to have a mom who loves genealogy, and so our family has a wealth of photos dating back to the 1800s. six generations are on this quilt! so are you ready gypsies? well here we go...

i used papers from our "free bird" series, grabbing and mixing and matching to create the quilt. to get a softer, more fabric-like effect, i dipped each piece in warm water and crunched it into a ball. then i opened them up and let them dry flat. because the paper is so thick it can take the abuse, and the end result is a softly rumpled look.

while the paper was drying, i printed out the photos on canvas. you can buy ink jet canvas at your local office supply store. i converted the photos to sepia tones, for a more antique look.

once the papers were dry, i tacked down the photos and other papers with a bit of adhesive, and then sewed each 6x6 panel - stitching the photos and paper trims onto the squares, and adding extra stitching for accents. then i sewed the squares into rows and stitched the rows together into the quilt.


final touches meant treating each square like a tiny page layout. i used authentique elements as well as lots of trinkets from my stash of random elements. i also used some bottle cap charms i've been experimenting with.

i hope this provides you with lots of inspiration. keep stopping by for more as the holiday season unfolds. don't forget to come back for the next "so knotty" tutorial tomorrow, and starting december 1, i'll be posting xmas projects galore!

materials used:
"free bird" papers and paper elements - authentique
trinkets - tim holtz idea-ology, marion smith, prima
"walnut stain", "vintage photo", "frayed burlap" - tim holtz distress inks

Wednesday, November 16, 2011

so knotty tutorial - loop-d-loop card

welcome back gypsies! i hope you've had fair travels so far this week. today's "so knotty" is the "loop-d-loop" card, a variation on the faux spiral notebook. ready? set? away we go!
first off was choosing the materials. for this card i chose some craft paper and some sheets from authentique's "free birds", little 6"x6" sheets you can buy individually for your own matching - sweet! and the twinery's "pink sorbet" is a perfect color match.

the craft paper is the card base, so after cutting it to 6"x 8", i tore 1/4" off the bottom edge of the card front. the floral paper is trimmed to 3"x5". the ledger paper is trimmed to 2"x4", making sure to fit in the watermark of bicycles.
next i pierced all around the edge of the card at 3/8" increments - tim holtz's acrylic ruler is perfect for this by the way, now that he's told me there are piercing holes in the ruler! i also lightly sanded the edges of the card because of course i can't have any plain edges.
using my biggest paper needle, i am able to thread the twine through and sew all the way around the card. i worked very loosely, using my pinkie as the loop guide and adjust as i went.
after lightly inking the edges of the ledger paper with "worn lipstick" distress ink, i layered the card papers and then pressed and flattened the twine loops into place.
and then the final touches - i love this part of the project! this time i chose a selection of random cool words and applied them to card's inside bottom edge, so they show below the torn cover edge. a postage stamp bicycle, circle type and a wheel tied on make for a joyful ride!

i hope today's "knottiness" inspired you, and was as much fun for you to see, as it was for me to make. don't forget to leave a comment below, and return to the caravan on november 19 for the "home sweet home hanger".

remember, every time you visit, you are entered to win this oh-so-knotty prize, so please enjoy your journeys this week, and see you back at the caravan.

Monday, November 14, 2011

don't bug me i'm crafting

so, i'll be the first to admit that i get a little focused when i'm designing. i noodle the ideas around in my head for days, working through what i want to do while i'm - driving the girl around, doing laundry, scooping up after our saint bernard. my eyes glaze over during other people's conversation as i solve a technique problem, or come up with a great new concept.

i spend a lot of time just thinking, so when i've finally noodled enough and sit down at the craft table my mantra is "don't bug me" often accompanied by dirty looks and heavy sighs. because you know, as soon as i sit down at my craft table, everyone needs me.

now, i love my family. i have a husband, a daughter, a saint bernard, two cats, a rabbit, assorted fish and a lizard in my house. i have loving parents, friends, and lots of aunties and uncles and cousins. but why do they all need me as soon as my butt hits the chair?

this weekend i was in creative overdrive - mostly self-created of course. i had lots i wanted to get done, and the family was going to be gone for most of the day for "daddy/daughter time".  here's how it went:

9:00am - family gone out, time to work
9:01am - dog needs out
9:05am - dog needs back in
9:25am - fat cat tries to jump onto craft table, grabs glue gun cord as he falls off the table edge, i can't stop laughing, cat tries to pretend he just really needed the glue gun
9:30am - i need coffee for this, run to starbucks
10:00am - dog needs out
10:05am - dog needs back in followed by extensive petting and love
10:15am - dog shakes head and showers me, the craft table and the project with drool
10:16am - clean up drool, shoo dog onto giant dog cushie
10:20am - phone rings, i ignore it and listen to the vmail from my mom wondering why she never gets to talk to me, she always gets the answering machine. no comment.
10:22am - working, finally
10:45am - dog needs a cookie
10:47am - grey cat is playing with something...alive
10:48am - after screaming like a big girl i get the lizard away from grey cat and release it back to the wild where it plays dead - probably in shock from my screams
10:49am - working, finally, again
11:00am - family home, "mom what's for lunch?" me: "i thought you guys would eat out", child: "but we wanted to eat with you..."
11:01am - put head down on table and cry

happy crafting everyone! if you stopped by for the "so knotty" tutorial, click here

Sunday, November 13, 2011

so knotty tutorial - faux spiral notebook card

hello gypsies and welcome to the first "so knotty" tutorial. today i'm showing how to make a faux spiral binding. the project i used this for was a card, but this can also be used in page layouts - think "back to school" - and smaller minibooks as binding instead a coil binding.

so are you ready? well here we go!

 
first i chose something rosey and bright - it's been grey and rainy for days here, and i needed some bloominess. i chose authentique's "uncommon" papers and the twinery's "stone" twine - perfectly matched!
now if you're new to my caravan you should know that i hate clean untouched edges. so after choosing a paper and cutting it to 4"x6", step one is sanding! i sanded down the edges of the papers and the "unique" element. don't be intimidated by sanding - authentique papers are very thick and take a lot of abuse so grind away. {i use a mat to protect my table.}
next i pierced a row of holes along one edge of the card. tim holtz's acrylic ruler is great for this - did you know it has a line of holes along one edge just for this kind of work? i didn't until he told me! for the spiral binding look you'll want to pierce at 1/8" increments.
next i used my biggest paper needle and threaded the twine through, and sewed. i kept the twine very loose, and occasionally adjusted the loops as i went. you can also use a pencil for this part - lay the pencil along the card's edge and sew around it to maintain your "coil".
now that the spiral binding is done, it's time to build the card. i lightly inked the edges of the "unique" element and all of the card papers with "worn lipstick" distress ink.
i selected 2 more pieces of paper for the card's base - one striped piece cut to 4 1/4" x 6", so a little piece of striping shows below the top layer, and one piece 8"x6" folded in half to make the 4"x6" card base. i layered all the papers then set the "unique" element with a double stack of pop-squares for extra height.
final touches are stamps - these are cut from a 12"x12" sheet from the "uncommon" collection, with the edges sanded and inked, of course!

i hope you've been inspired by today's "so knotty" tutorial. make sure to leave a comment below and come back for the next "knottiness" on november 16 - the "loop-d-loop" card. remember, every time you visit and leave a comment, you're entered in the drawing for this fabulous prize!
so enjoy your journeys this week, and see you back at the caravan!

Saturday, November 12, 2011

time to get knotty!


Welcome to the Authentique ~ The Twinery Blog Hop!
Blog Hop Prizes: {*2 total winners*}
From Authentique Paper – Authentique Paper prize pack ($20 retail value)
From The Twinery – Colorful Bunch Sampler Pack ($20 retail value)
To win: Participants should leave a comment on each blog along the hop. (Winner will be chosen randomly from all comments on the manufacturer blogs AND the DT blogs.) {Winner must have a US/Canada address}
Blog Comments Close: Monday, November 14th @ 11:59pm (Pacific)
Winner Announced: Wed, Nov 16th (on Authentique Paper's blog and The Twinery's blog).

Welcome gypsies! You've probably just come from the blog of Deena Neimat. If the gypsy caravan is your first stop, make sure you travel back to the start of the hop at the Authentique blog.

"So Knotty Tutorials"
What would a trip to the gypsy be without fabulous prizes? All month I'll be featuring tutorials on the techniques used today. Every time you stop by and leave a comment, you're entered in the drawing for ... twine from The Twinery, and a Free Bird Nest from Authentique Paper - sweet!
And now fellow gypsies, onward we go!

Faux spiral notebook card - tutorial Nov 13
Loop-d-loop card - tutorial Nov 16
Home Sweet Home hanger - tutorial Nov 19
Xmas tag - tutorial Nov 23
Sweater Letters - tutorial Nov 26
All right gypsies, I hope you found inspiration today. Off you go to visit Ivona Foster and I hope to see you back tomorrow for my first "So Knotty" tutorial!

Thursday, November 10, 2011

joy at the beach


every year my little gal and i meet up with my best and oldest friend and her daughter. they live in new mexico now, so every time they come, we head to the beach. this year i loved watching sicily play with the waves - her whole body says "joy".

this layout features some authentique "free bird". i loved the muted colors and the fast matting i could do with these cute little papers. i added a couple of different crocheted trims, and some sand for extra beachiness, and used one of my favorites - vintage buttons.


the layout was also a part of the authentique "november sketch challenge". make sure you stop by the blog and check out the other awesome ideas. you can also enter your own layout or card for the challenge, and maybe win a fabulous prize! tell them the gypsy sent you!


materials used:
authentique "free bird"
authentique "gathering"
crochet trim
vintage buttons
chipboard letters
tim holtz distress ink in "frayed burlap"
mudpuddles "malibu beach"

Sunday, November 6, 2011

Welcome Gypsies to the Handmade Holidays Blog Hop!!!


Calling all crafters! We’ve gathered designers from some of our favorite manufacturers to show you ways to create something from the heart this holiday season. This 3 day Hop includes over 60 stops with inspiration brimming from every corner. Explore all thoughtful and frugal handmade gifts you could make for the holidays, all in one place on this Hop!
To sweeten to Hop, we’re offering a gift for you! How does one of the 6x6 Bundles from EACH of Authentique Paper's current 7 collections sound?
For every comment you leave on the blogs in the Hop, you'’ll be entered to win a prize pack from one of the participating manufacturer sponsors (including the fabulous prize pack from Authentique Paper)!
Visit the list of blogs below and leave a comment on each by Nov 7, 2011 at 11:59 PM {PST}. Each day we will be sharing a brand new list of blogs with brand new projects for you to explore, be inspired by, and create from! 
You've probably just visited the amazing Karen Clark. Be sure to visit the blogs of some more design team members from all over the industry. What a privilege to see my name on this list of fabulous artists!

Clearsnap
Spellbinders
Hampton Art
Zutter
Graphic45
Donna Salazar Designs
The Twinery
Authentique Paper
Glue Arts
Sabrina Alery – Clearsnap
Laura Denison – Graphic 45
Karen Taylor – Donna Salazar Designs
Beverly Sizemore – Hampton Art
Kazan Clark – Spellbinders
Janeen Shember – Authentique Paper
Charlotte Jenkins – Clearsnap
Grace Hester – The Twinery
Nicole Eccles – Graphic45
Audrey Pettit – Donna Salazar Designs
Nan Paturzo – Zutter
Jeannie DeGruccio – Authentique Paper
Tamara Tripodi – Glue Arts

Cheers to creating gifts from the heart this holiday season!
Happy Hopping and now for my handmade holiday madness! 

Part 1 - the great frame-up!
We're starting with a simple pine frame from the local craft supply store, Authentique Paper's "Gathering" collection, and some Glue n Seal.
First I cut the paper into thin strips - less than 1/4" is best. Starting in the top corner, I applied a thin layer of Glue n Seal to a small section, and place strips in random order, side by side. I left the edges hanging over both sides of the frame.
After allowing a little dry time for the front, I applied Glue n Seal to the sides, wrapped the strips and trimmed to fit.
Keep going until the entire frame is covered. Go for randomness, don't try to create a repeating pattern. The charm is in the spontaneity.
Part 2 - And now it's time for flowers
I started by hand cutting 5 circles, each about 2". It's easiest if you cut 2" squares with a trimmer, then hand cut the circles from them.
Next, I misted 4 circles and crumpled them into balls. Then I pulled them open and folded them each in half, and in half again. Then I scrunched and shaped each piece into a flower bud shape.
Finally, I glued the 4 flower bud shapes onto that fifth circle, scrunching and shaping to achieve a carnation-style flower. I also made additional buds by misting, scrunching and folding circles, but not gluing them into a flower form.
Part 3 - time to get it all together!
I like edginess. So I used a Ranger Ink Acrylic Paint Dabber and dabbed Espresso around the inside and outside edges of the frame. Then I hot glue gunned the flower and buds onto the frame. 
And finally I added some special touches. Prima's "Say it in crystals", trinkets from Maya Road, Authentique "Elements" and some felt leaves from my special drawer combined quite nicely, giving the frame the look of a page layout.
Thank you for stopping by the gypsy caravan. I hope you join the caravan and become a gypsy yourself! Make sure you keep hopping along to get more inspiration for a handmade holidays!

Materials:
Authentique Paper "Gathering" collection papers and elements
Pine frame from Michael's craft store
Adirondack Acrylic Paint Dabber in "Espresso"
Glue n Seal
Prima "Say It In Crystals"
Maya Road lace doilies and cameo roses

And if you're just joining the hop today, take a look at what's been going on all weekend!
November 5th:

November 4th: